There is a cold you only feel in January. The kind that settles into your bones and refuses to leave until something warm, impossibly rich, and fragrant with ghee and cardamom lands in a bowl in front of you. Instant Moong Dal Halwa is that thing. Golden, grainy, glossy, and deeply satisfying in a way that no other Indian dessert quite manages to replicate.
Moong Dal Halwa has deep roots in Rajasthani and North Indian cooking, where it is made for weddings, cold-weather festivals, and auspicious occasions. It is the kind of mithai that halwai shops start making in October and keep going until March. Traditionally, the process involves soaking raw dal, grinding it wet, and then cooking it for what feels like an eternity. The result is extraordinary. But most of us do not have an hour to stand at the stove stirring a pot, no matter how much we love the outcome.
This instant moong dal halwa recipe changes the equation completely. By roasting dry dal and grinding it to a coarse, sand-like powder, you get that signature grainy halwai texture in under 40 minutes. The trick with sooji and besan is something I stumbled on after a few frustrating batches, and it is the reason this version tastes richer than it has any right to. If you have ghee in your kitchen and an hour to spare this weekend, you have everything you need.
Why You'll Love This
No Soaking Needed
Traditional moong dal halwa requires soaking raw dal for 4 to 6 hours before grinding. This recipe skips that entirely by dry-roasting and grinding the dal instead, saving you hours of planning. You can decide to make this at 4pm and have it on the table by 5.
Real Halwai Texture
The coarse grind is the secret to getting that grainy, melt-in-the-mouth texture you find at wedding buffets. Fine flour gives you a paste. A coarse, sooji-like powder gives you the real thing, where each grain of dal is distinct even after cooking.
Ghee Release Method
Adding the final quarter cup of ghee at the very end, rather than all at once upfront, gives the halwa a glossy, restaurant-finish shine and a richness that coats the back of a spoon. This is the same technique professional halwais use, and it takes less than two minutes extra.
Khushi's Pro Tip
I learned this after two batches that turned out gummy: the sugar syrup must be poured in hot, not warm. Cold syrup shocks the roasted dal and creates hard lumps that take forever to dissolve. Keep that saucepan on low heat right until the moment you pour it in. This one thing changes everything.
Star Cast
Key Ingredients
Yellow Moong Dal
This is the entire foundation of the recipe. It must be coarsely ground after dry roasting, not powdered fine. If you grind it too fine, the halwa will taste dense and sticky instead of grainy and light. There is no substitute here since this is moong dal halwa, but you can use split moong dal with skin removed.
Ghee (Melted)
Do not try to reduce the ghee. This is the one recipe where ghee is not a flavouring but a structural ingredient. It keeps every grain of dal separate, creates the glossy finish, and carries the cardamom fragrance through every bite. Refined oil will not work. Butter can work in a pinch but will change the flavour significantly.
Sooji
Two tablespoons of sooji (semolina) roasted in the ghee before the dal goes in creates a non-stick, slightly gritty base that prevents the dal from clumping and sticking to the bottom of the pan. It also adds a very subtle texture contrast. Do not skip this step, even if it seems like a small amount.
Cardamom Powder
Elaichi powder added at the end of cooking rather than the beginning keeps the fragrance bright and clean. If you add it too early, the heat kills the volatile oils and you lose that floral top note. Always grind fresh cardamom pods if you can. Pre-packed cardamom powder works, but fresh is noticeably better.
Cook Along
Ingredients
The Dal Base
- 1 cupYellow Moong Dal(washed, dried, dry-roasted, and coarsely ground)
- 2 tbspSooji(fine semolina)
- 2 tbspBesan(chickpea flour)
The Ghee
- ¾ cupGhee(melted, for cooking)
- ¼ cupGhee(melted, reserved for the final gloss)
The Sweet Syrup (Chashni)
- 1 cupSugar
- 2 cupsWater
The Finishing Touches
- 1 tspCardamom Powder(Elaichi, added at the end)
- ⅓ cupMixed Dry Fruits(almonds, cashews, pistachios, roughly chopped)
Instructions
Tap a step number to mark it done as you cook.
Prep the Dal — Wash, Dry, and Roast
- Place 1 cup of yellow moong dal in a bowl and wash it gently under running water to remove any dust or debris. Drain it completely.
- Spread the washed dal on a clean kitchen towel and pat it dry. It does not need to be bone dry, but it should not be dripping wet either.
- Heat a wide pan on medium flame without any oil or ghee. Add the dal and dry roast it, stirring continuously, for 8 to 10 minutes until all moisture evaporates, the dal turns a light golden colour, and it feels crisp when you press one between your fingers.
- Take the pan off the heat and let the dal cool for 5 minutes. Transfer it to a mixer and grind it to a coarse powder. The texture should feel like sooji or fine sand, not like smooth flour. This coarse texture is everything.
The Secret Start — Building a Non-Stick Base
- Heat a heavy-bottomed kadhai on medium flame. Add ¾ cup ghee and let it melt and warm through, about 1 minute.
- Add the chopped cashews and almonds to the hot ghee. Roast on medium flame, stirring often, for about 2 minutes until they turn golden and fragrant. Remove them with a slotted spoon and set aside. Leave the ghee in the pan.
- Into the same hot ghee, add 2 tbsp sooji and 2 tbsp besan. Roast on medium flame, stirring constantly, for 1 to 2 minutes until the mixture smells nutty and turns a very light golden. This creates an aromatic, non-stick base that prevents the moong dal from clumping and sticking.
The Main Bhuna — The Heart of the Recipe
- Add the coarse moong dal powder to the pan and mix everything together. It will look crumbly and dry at first. That is exactly right.
- Reduce the flame to low-to-medium. Begin roasting the dal, stirring continuously, every 30 seconds or so. Do not walk away from this pan.
- Keep stirring for 10 to 12 minutes. You will see the mixture go from pale and crumbly, to slightly pasty as the ghee absorbs, to loose and sandy again as it dries out. The colour will deepen to a rich golden brown and your kitchen will fill with an irresistible nutty, toasted fragrance. When the dal looks evenly golden and the ghee starts to appear slightly separated at the edges, it is ready for the syrup.
The Chashni — Simple Sweet Water
- While the dal is roasting, heat 2 cups water and 1 cup sugar together in a small saucepan on medium flame.
- Stir until the sugar dissolves completely and the liquid comes to a full boil. You do not need any thread consistency here. It is just hot, sweet water. Keep it on a low flame so it stays hot until you need it.
The Magic Transformation — Adding the Syrup
- Once the dal is roasted to a rich golden brown, remove the kadhai from direct high heat for a moment. Slowly and carefully pour the hot sugar syrup into the roasted dal mixture.
- Stand back slightly as you pour. The mixture will bubble up and splutter aggressively. This is normal. Keep your hand away from the steam.
- Stir vigorously and continuously to break any lumps as they form. The dal will absorb the water very quickly and swell up, turning from a loose powder into a thick, soft halwa. Keep stirring until there are no dry patches left.
The Ghee Release — Getting That Halwai Shine
- Return the kadhai to low heat. Add 1 tsp cardamom powder and stir it in gently.
- Add the remaining ¼ cup of ghee now. This final addition of ghee is what gives the halwa its glossy, professional finish.
- Cook on low heat, stirring every couple of minutes, until the halwa pulls away from the sides of the pan and small pools of ghee appear at the edges. This usually takes 4 to 5 minutes. That ghee release is your signal that the halwa is perfectly cooked.
Garnish and Serve
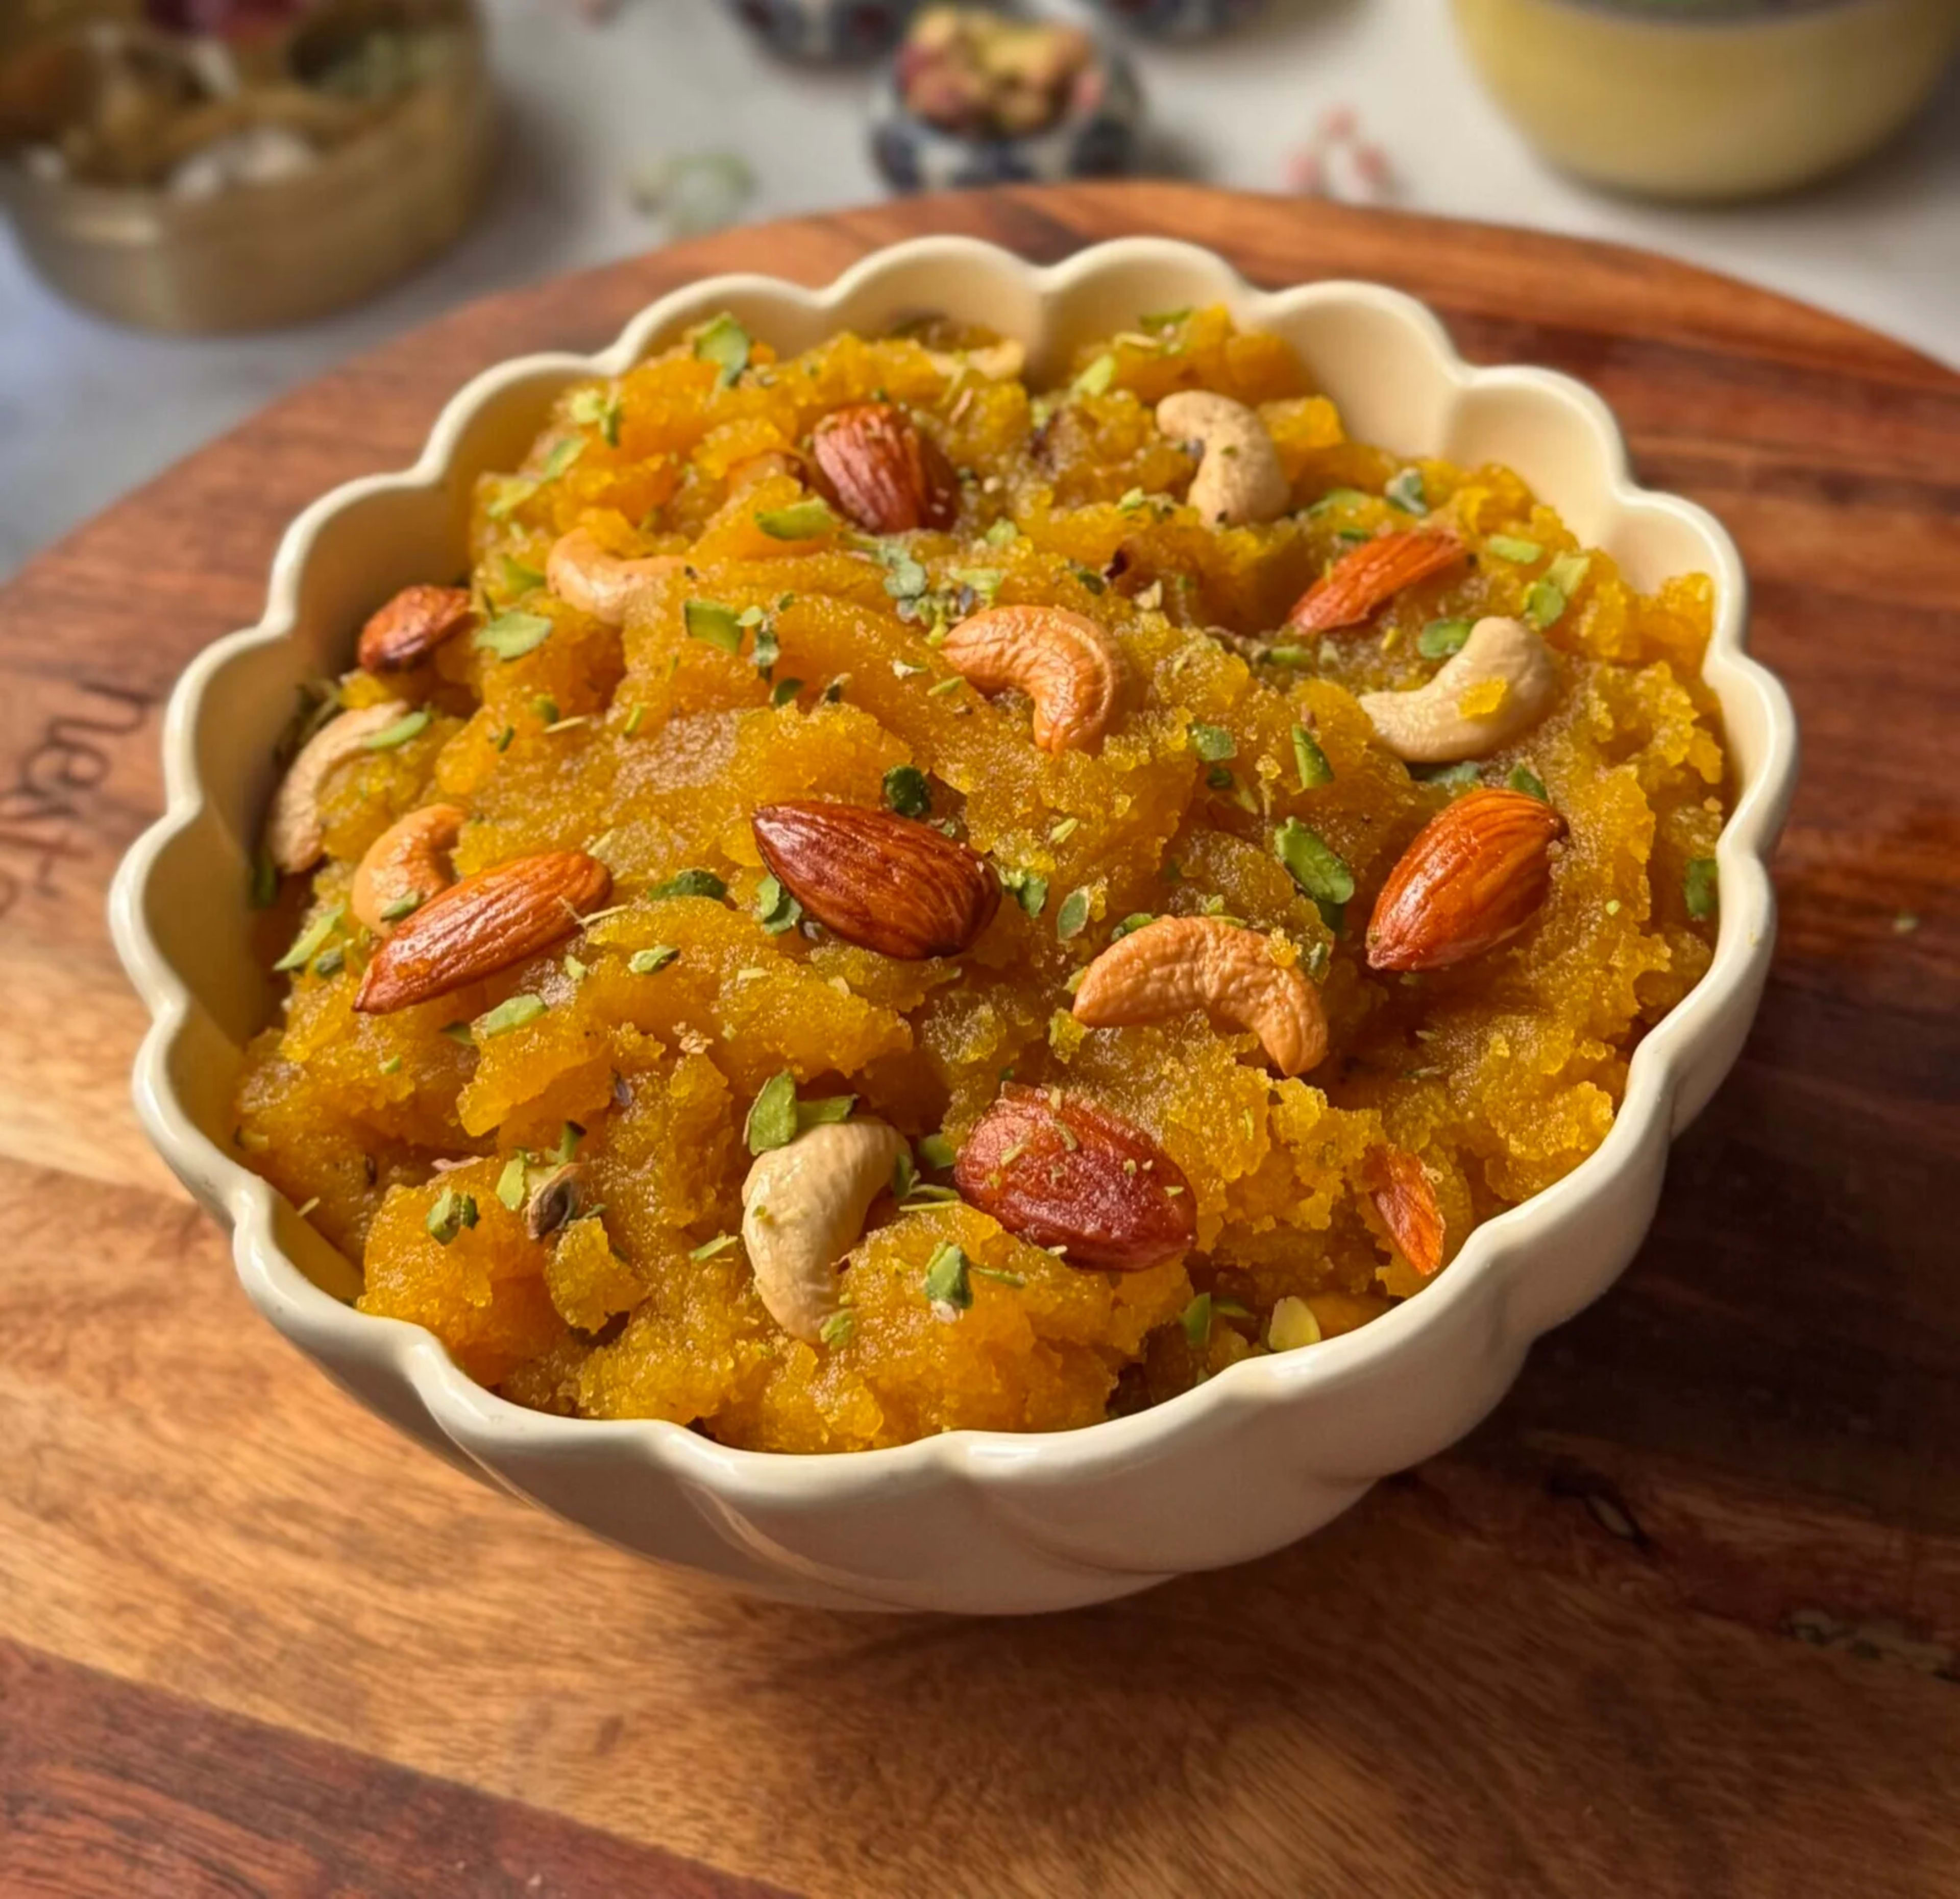
- Fold in the fried cashews and almonds. Add a few pistachios on top for colour if you like.
- Serve immediately while it is piping hot. Moong Dal Halwa is at its very best the moment it comes off the stove, warm and fragrant and glossy. Scoop it generously.
Pairs Perfectly With
Storage & Make-Ahead
Moong Dal Halwa keeps well in an airtight container in the refrigerator for up to 4 days. It will firm up in the cold. To reheat, place a portion in a small pan on low flame with ½ tsp ghee and stir gently until it loosens and warms through. Freezing is possible for up to 1 month. Thaw fully and reheat slowly with a little ghee.
Try These Too
Kesar Moong Dal Halwa (Saffron Version)
Dissolve ¼ tsp of good quality kesar (saffron strands) in 2 tbsp of warm milk and add it along with the sugar syrup. The halwa will turn a gorgeous deep yellow and take on that distinctive saffron fragrance that makes it feel especially celebratory and fit for a festival spread.
Condensed Milk Moong Dal Halwa
Replace the plain sugar syrup with ½ cup condensed milk mixed into 1½ cups warm water. This version is creamier, richer, and slightly fudgier in texture. Reduce the loose sugar to ½ cup since condensed milk brings its own sweetness, and taste as you go before adding more.
Jaggery Moong Dal Halwa (Gur Version)
Swap white sugar for ¾ cup grated jaggery (gur) dissolved in 2 cups warm water for a deeper, more complex, caramel-like sweetness that feels more traditional and wholesome. Strain the jaggery water before adding it to remove any impurities. The colour of the final halwa will be deeper and more russet than the sugar version.
Affiliate
Shop the Recipe

Heavy Bottom Hard Anodized Kadai
Halwa burns easily in thin steel pans. A heavy pan ensures even roasting.
Buy on Amazon
A2 Desi Cow Ghee
Since ghee is a main ingredient, the flavor of the halwa depends entirely on the quality of the ghee you use.
Buy on Amazon
Silicon Spatula
Helps you grease the Appe pan cavities with minimal oil, keeping the snack healthy.
Buy on Amazon* Some links are affiliate links. Clicking and purchasing may earn a small commission at no extra cost to you.
Frequently Asked Questions
Similar Posts

