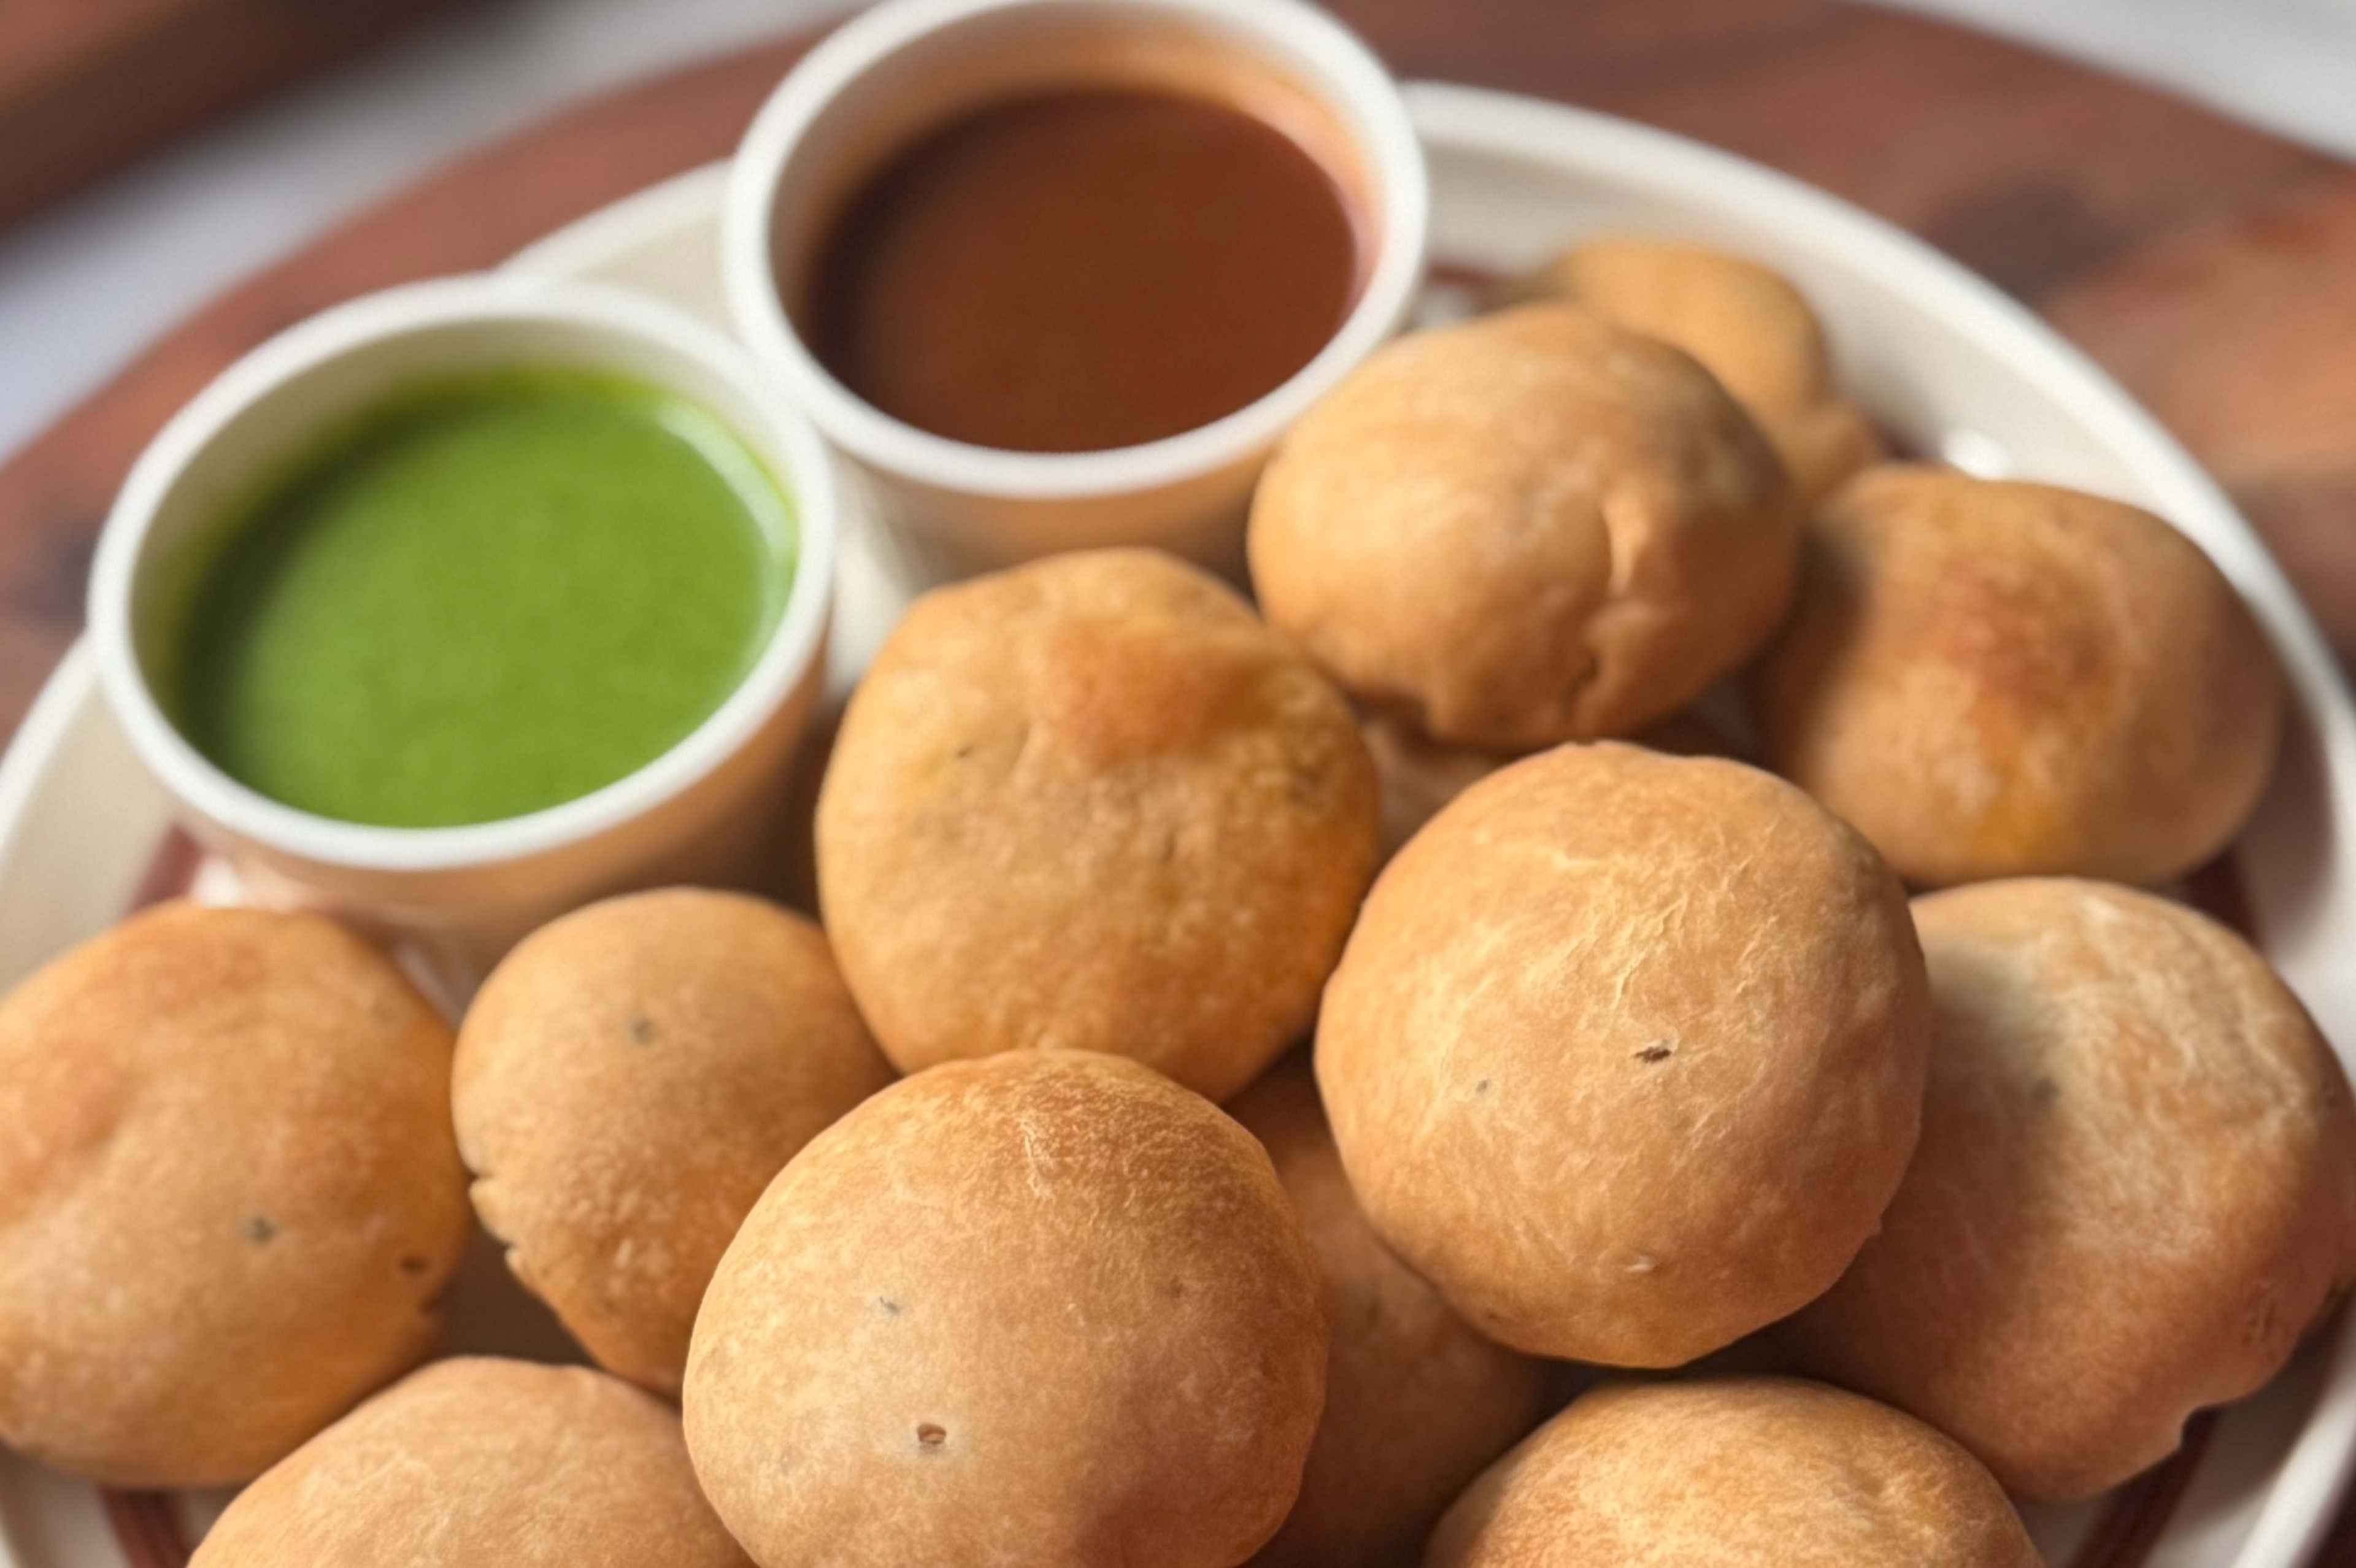
Crispy Gujarati Kachori
Golden, stuffed, and impossible to eat just one
foodiegujarati.com/recipes/crispy-gujarati-kachori
There is a specific kind of hunger that no fruit, no biscuit, and no sensible snack can cure. The 5pm kind, when the afternoon has gone on too long and the smell of something hot and crispy from the next lane is making it worse. That is exactly the hunger that a Gujarati kachori recipe was made for. Shatteringly crisp on the outside, spiced moong dal filling on the inside, and that first bite that absolutely refuses to be quiet about it.
Kachori has been a staple of Gujarati street food and home kitchens for generations. In Gujarat, you will find it at every nashto stall (breakfast and snack stall), packed into tiffins for long train journeys, and stacked on plates at weddings before the proper meal even begins. The filling varies by household and region — some use urad dal, some use matar, but the moong dal version with fennel and tamarind is the one that most Gujaratis will tell you is the real one. It is the kind of food that has a specific memory attached to it for almost everyone who grew up eating it.
This version uses crushed namkeen moong dal for the stuffing, which means the filling is already flavoured and comes together in minutes. No soaking, no grinding, no long prep. The dough is a simple maida and ghee base with ajwain for that signature flavour. Whether you deep fry them or finish them in an air fryer, the result is proper kachori, the kind that deserves a generous drizzle of both chutneys. Make these today — your kitchen will smell incredible and everyone will show up the moment the oil gets hot.
Why You'll Love This
Namkeen Dal Shortcut
Using crushed namkeen moong dal for the stuffing cuts prep time by at least 20 minutes. The dal is already toasted and seasoned, so your filling needs almost no cooking — just mix, roll, and stuff.
Air Fryer Friendly
You can make these completely oil-free in an air fryer and still get a genuinely crisp shell. The texture is slightly different from deep fried but still satisfying, making this a snack you can make any day of the week without guilt.
Perfect for Lunchboxes
Kachori stays crisp at room temperature for several hours, which makes it one of the best snacks for a kids lunchbox or a packed tiffin. No reheating needed and no sogginess as long as you let them cool fully before packing.
Khushi's Pro Tip
The mistake I see everyone make is rolling the outer dough too thin. Thin dough tears when you seal the kachori and lets oil seep in during frying, making it greasy instead of crisp. I keep mine slightly thicker than a regular puri, about 3mm. A thicker shell also gives you that satisfying crunch on the first bite.
Star Cast
Key Ingredients
Namkeen Moong Dal
This is the soul of the stuffing. Using pre-seasoned namkeen moong dal means the filling is already carrying flavour before you add a single spice. If you use plain raw or boiled dal, the texture and taste will be completely different. Look for a good quality namkeen moong dal — the crunch and oil content in it also helps bind the stuffing together.
Ghee
Ghee in the dough is not optional. It creates the moyan (fat rubbed into flour) that gives kachori its signature flaky, crisp shell. If you use oil instead, the dough will fry up harder and less layered. Two tablespoons is the right amount here — enough to coat the flour without making the dough too soft to work with.
Ajwain
Ajwain (carom seeds) in the dough is what makes this smell and taste distinctly like kachori and not a plain puri. It also aids digestion, which is always welcome when you are eating a deep fried snack. Do not skip it. If you genuinely cannot find it, a small pinch of dried thyme is the closest substitute though the flavour will not be identical.
Imli Chutney
A tablespoon of tamarind chutney goes directly into the stuffing, not just on the side. This is what gives the filling that sweet-sour-spicy balance that makes Gujarati kachori so addictive. Without it, the filling tastes flat. Use a thick, well-spiced imli chutney — homemade or a good store-bought one both work fine.
Cook Along
Ingredients
The Flaky Kachori Dough
- 2 cupsall purpose flour (maida)
- 2 tbspghee
- 1 tspajwain (carom seeds)
- 1 tspsalt
- ½ cupwater(add gradually — you may need slightly more or less)
The Spiced Moong Dal Stuffing
- 1 cupnamkeen moong dal(crushed coarsely with your hands or in a blender)
- 1 tspgreen chilli ginger paste
- 1 tspsaunf (fennel seeds)
- 1 tspturmeric powder
- 1 tspred chilli powder
- 1 tspgaram masala
- 1 tspchaat masala
- 1 tspcoriander powder (dhaniya powder)
- 1 tbspimli chutney (tamarind chutney)
- 2 tbspfresh coriander (dhania)(finely chopped)
- ½ tspsalt(taste before adding — namkeen dal is already salted)
For Frying and Serving
- oil for deep frying(enough to fully submerge the kachoris)
- imli chutney (tamarind chutney)(for serving)
- green coriander chutney(for serving)
Instructions
Tap a step number to mark it done as you cook.
Build the Dough — Flaky Starts Here
- In a large mixing bowl, combine 2 cups of maida, 1 tsp ajwain, and 1 tsp salt. Mix them together dry first so the ajwain distributes evenly through the flour.
- Add 2 tbsp of ghee and rub it into the flour with your fingertips, pressing the fat into the flour until the mixture resembles coarse breadcrumbs. This step — called moyan — is what creates the flaky shell, so take a full 2 minutes on this.
- Add water a little at a time, mixing as you go, until the dough comes together into a firm, smooth ball. It should feel stiffer than roti dough. Cover with a damp cloth and rest for 10 minutes.
The Stuffing — Bold, Tangy, and Ready in Minutes
- Take 1 cup of namkeen moong dal and crush it coarsely using your hands or a quick pulse in a blender. You want small broken pieces, not a fine powder — this gives the filling texture.
- In a mixing bowl, combine the crushed dal with green chilli ginger paste, saunf, turmeric powder, red chilli powder, garam masala, chaat masala, coriander powder, and imli chutney.
- Add the finely chopped fresh coriander and mix everything together until well combined. Taste before adding salt because the namkeen dal is already seasoned. Divide this filling into equal small balls, roughly 1 heaped tablespoon each.
Divide the Dough and Roll
- Divide the rested dough into equal portions that match the number of stuffing balls you have made. Each dough ball should be slightly larger than the stuffing ball.
- Flatten one dough ball with your palm and roll it into a small disc, slightly thicker than a regular puri, about 3mm thickness. Do not roll it too thin or it will tear when you seal it.
Stuff and Seal — No Gaps, No Leaks
- Place one stuffing ball in the centre of the rolled disc. Bring the edges of the dough up around the stuffing and pinch them together firmly at the top, like closing a money purse.
- Twist off any excess dough at the top and press down gently to flatten the kachori into a round disc. Make sure there are no cracks or gaps in the seal — any opening will let oil rush in during frying and the kachori will turn soggy instead of crisp.
- Repeat for all the remaining dough and stuffing. Keep the finished kachoris covered with a cloth while you prepare the oil.
Deep Fry to Golden Perfection
- Heat enough oil in a deep kadhai for the kachoris to be fully submerged. To test if the oil is ready, drop a tiny pinch of dough into it. If it rises to the surface within 3 seconds and sizzles steadily, the oil is at the right temperature, around 160 to 170 degrees Celsius.
- Slide in the kachoris gently, 2 or 3 at a time depending on your pan size. Do not crowd the pan. Keep the flame on medium-low. Kachori needs to fry slowly so the inside heats through while the outside turns evenly golden.
- Fry for 8 to 10 minutes, turning gently every couple of minutes, until the kachoris are deep golden brown all over. Remove with a slotted spoon and drain on a plate lined with paper towels.
Air Fryer Method — Lighter but Still Crispy
- If using an air fryer, brush or lightly spray each kachori with oil on both sides before placing them in the basket. Do not stack them.
- Air fry at 180 degrees Celsius for 20 to 25 minutes, flipping them over at the halfway mark so both sides crisp up evenly. They will be slightly less golden than the deep fried version but the shell will still be crisp and the filling will be hot all the way through.
Serve Hot with Both Chutneys
- Serve the kachoris immediately while hot. Place them on a plate and generously drizzle both imli chutney and green coriander chutney over the top, or serve the chutneys on the side for dipping.
- If packing for a lunchbox, let them cool completely on a wire rack before placing them in the box. A good kids lunchbox with separate compartments keeps the chutneys from making the kachoris soft during transit.
Pairs Perfectly With
Storage & Make-Ahead
Kachori stays crisp at room temperature for up to 6 hours if left uncovered on a wire rack. In an airtight container in the refrigerator, they keep well for 2 days. To reheat, use an air fryer at 160 degrees for 5 minutes or a dry tawa on low flame. Avoid the microwave as it makes the shell soft. Unbaked stuffed kachoris can be frozen for up to 1 month and fried directly from frozen.
Try These Too
Cheesy Moong Dal Kachori
Add 2 tablespoons of grated processed cheese or mozzarella to the prepared moong dal stuffing before rolling into balls. The cheese melts into the filling during frying and adds a rich, creamy layer that kids absolutely love alongside the spiced dal.
Baked Oven Version
Brush the stuffed kachoris generously with ghee or oil on all sides and bake in a preheated oven at 190 degrees Celsius for 25 to 30 minutes, turning them once halfway through. They will not be as deeply golden as the fried version but the shell crisps up nicely and the filling stays moist.
Matar Kachori Variation
Replace the moong dal stuffing with a spiced green peas filling made by coarsely mashing boiled matar with the same spice mix and a pinch of dry mango powder (amchur) instead of imli chutney. This is the Rajasthani-style kachori that is just as popular across Gujarat during winter when fresh peas are in season.
Affiliate
Shop the Recipe


* Some links are affiliate links. Clicking and purchasing may earn a small commission at no extra cost to you.
Frequently Asked Questions
Enjoyed this recipe?
Rate this recipe
Similar Posts


Never Miss a Recipe
From Khushi's Kitchen
to your inbox
New recipes, seasonal specials, and kitchen stories — no spam, ever.
No spam. Unsubscribe anytime.